Sichuan Lanfan Transport Construction Co., Ltd. specializes in the production of various metal mesh fences.
Leave Your Message

How to Choose a Square Defensive Bastion Barrier in 2026

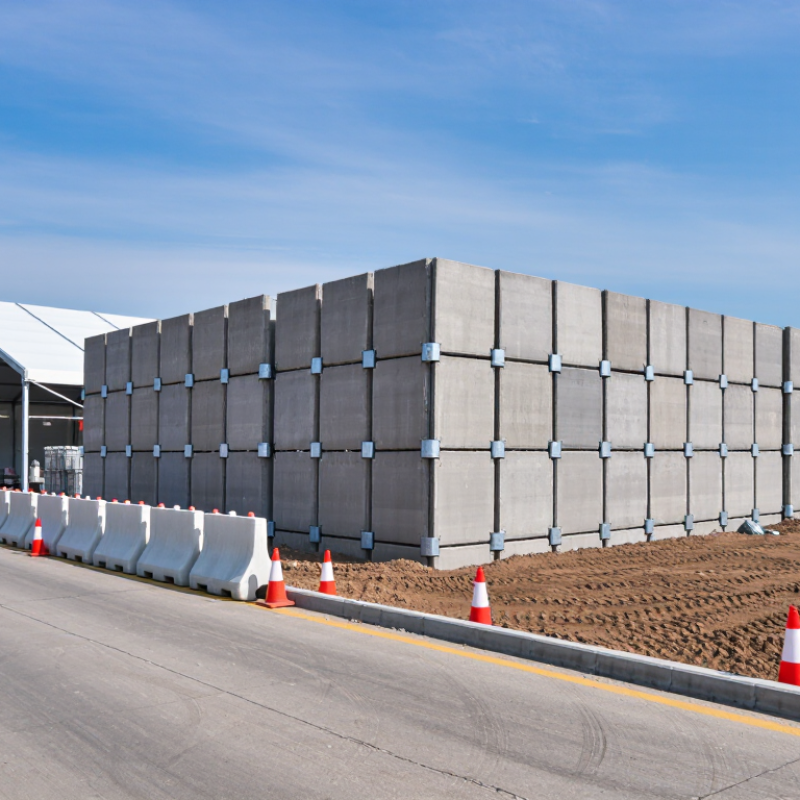
Choosing a Square Defensive Bastion Barrier in 2026 starts with the site, not the product photograph. A barrier beside a vehicle checkpoint faces different demands from one used to protect a temporary work area. Measure the available footprint, note the ground conditions, and consider how people and equipment will move around it. A narrow access lane, uneven soil, or poor drainage can change what works in practice. Small details matter.

Compare the barrier’s dimensions, materials, connection system, and filling requirements against the manufacturer’s specifications. Check whether the selected model can be handled with available equipment and assembled by the intended crew. Ask how it performs on the ground you actually have, rather than relying on a general product description. Also review inspection needs, storage conditions, and replacement-part availability. Those questions are not glamorous. They prevent avoidable surprises.

A Square Defensive Bastion Barrier should suit a defined purpose and a realistic operating environment. Review relevant safety guidance, site rules, and qualified technical advice before installation. Do not assume that a larger unit is automatically stronger, or that one design fits every layout. Product claims deserve verification. Even a careful selection can miss something; weather, access, and changing site conditions may expose overlooked issues. Treat the choice as a documented assessment, then revisit it after the barrier is installed and used.
How to Choose a Square Defensive Bastion Barrier in 2026

Define the Purpose and Site Requirements

Define the mission before choosing a square defensive bastion barrier. Is it meant to guide movement, create a protected work area, or reduce exposure to windblown debris? These purposes require different heights, lengths, entry points, and inspection routines. A tidy square is not automatically a safe one. Consider who will occupy the space, for how long, and how responders will enter it.

Survey the site in person. Note slopes, soft ground, drainage paths, buried utilities, nearby structures, and vehicle access. FEMA’s National Risk Index assesses 18 natural hazards across U.S. communities; use its data as an initial screening tool, not as a substitute for local engineering review. A low-lying pad may collect runoff even when nearby roads stay dry. Soil bearing capacity and surface-water flow can affect stability, so confirm both with qualified professionals.

Write down the required footprint and operating conditions before comparing barrier layouts. Include space for doors, inspection access, and equipment movement, then check that the proposed location does not block essential routes. Measure twice. I would also record assumptions, especially where site drawings are outdated; that small task is easy to skip. Local hazard data, geotechnical findings, and applicable engineering criteria should inform the final layout and anchoring approach.


Compare Bastion Barrier Materials and Configurations

How to Choose a Square Defensive Bastion Barrier in 2026

Compare Bastion Barrier Materials and Configurations

Material choice affects corrosion resistance, handling, drainage, and service life. Galvanized steel mesh provides a rigid cage and holds its shape under pressure. Its coating can wear at cut edges or where stones rub repeatedly. Geotextile liners contain finer fill and reduce soil loss through the mesh openings. They are lighter to handle, but exposed fabric may suffer from abrasion or prolonged sunlight. That matters.

The fill deserves equal attention. Angular, clean aggregate tends to interlock and drain well, while local soil may be easier to source but can settle or retain water. Check the actual fill before ordering; a sample bucket can reveal fines that a specification sheet misses. This step is sometimes skipped, and the resulting uneven face can be frustrating to correct.

Square modules suit compact footprints, but their dimensions and connections influence stability. A single row is simpler to place; connected, layered rows can provide more depth and help distribute loads. Compare mesh aperture, wire thickness, liner weight, connection hardware, and module size together, not as isolated numbers. Site conditions still matter. Soft ground, sharp debris, and repeated wetting may change which combination performs best. I would not treat one configuration as universally superior; even a well-chosen design can need adjustment after the first fill settles.

Assess Dimensions, Stability, and Environmental Conditions

A square defensive bastion barrier should fit the site, not just the drawing. Measure the usable footprint, access lanes, and required protected height before selecting dimensions. Then estimate the filled weight and check whether the ground can support it without settlement. FEMA’s Coastal Construction Manual (FEMA P-55) treats flood forces, erosion, and corrosion as site-specific design concerns; these same checks matter when barriers face standing water or exposed soil. A level, compacted base helps, but soft shoulders can still shift. Small details matter.

Stability depends on more than stacking units neatly. Inspect connectors, seams, and corners, and confirm the specified fill and installation method. Loose or uneven fill can create bulges; poor drainage can wash out supporting soil. NOAA’s 2022 Sea Level Rise Technical Report projects 10–12 inches of sea-level rise along U.S. coastlines by 2050, relative to 2000. That projection is not a local flood forecast, but it is a reason to check updated site maps and expected water levels. Consider freeze-thaw cycles, salt exposure, wind, and nearby runoff before choosing materials. I would not assume a square footprint guarantees stability; I would verify the foundation after rain, because real ground rarely behaves like a clean diagram.

Verify Standards, Installation Needs, and Maintenance

How to Choose a Square Defensive Bastion Barrier in 2026

A barrier’s square footprint is only useful if its mesh, coating, and fill meet the project specification. Check whether the system is welded or double-twisted, then verify the applicable standard: ASTM A974 covers welded-wire gabions, while ASTM A975 covers double-twisted mesh. Request test certificates for wire strength, coating, and mesh dimensions. Paperwork matters.

Installation quality affects stability. FHWA’s 2012 Geosynthetic Reinforced Soil Integrated Bridge System guide uses compacted lifts of up to 8 inches as a construction benchmark. That guidance is not a universal bastion specification, but it shows why fill placement and compaction deserve attention. Confirm the prepared base, drainage route, connector spacing, and approved fill size before crews begin. After installation, inspect for bulging, loose ties, damaged coating, blocked drains, and settlement. Record changes after heavy rain or impact, and set inspection intervals to match site exposure. I would not assume a visual check alone reveals corrosion beneath packed fill.

Tips: Photograph corners and connections before filling. Keep spare ties on site. Compare each delivery’s certificates with the approved specification, and flag mismatches before installation.

How to Choose a Square Defensive Bastion Barrier in 2026 — Verify Standards, Installation Needs, and Maintenance
Selection Dimension What to Verify Evidence or Practical Check Decision Guidance
Square footprint and dimensions Confirm the assembled unit’s external length, width, height, and usable internal volume. Check whether the stated dimensions apply before or after filling. Request a dimensioned drawing and measure a sample or completed unit. Compare the footprint with the available ground area and required layout. There is no single universally required “square” size. Select dimensions to suit the site plan, transport limits, and project-specific design.
Intended use and design loads Define the function, expected exposure, required service life, and any loads or hazards the barrier must withstand. Have a qualified designer review site conditions, including ground strength, drainage, slope, water exposure, and any project-specific impact or protection requirements. Do not assume that a product’s appearance or fill weight proves a particular level of protection. Require documented, application-specific design information.
Geotextile properties Check the fabric’s tensile strength, water flow, opening size, mass per unit area, and resistance to ultraviolet exposure as relevant to the design. Review test reports. ASTM D4632/D4632M covers grab breaking load and elongation; D4491/D4491M covers water permeability; D4751 covers apparent opening size; D4355/D4355M covers UV exposure; D5261 covers mass per unit area. These ASTM documents are test methods, not universal pass/fail specifications. The project designer should set required values and confirm the reported test methods and results.
Standards and documentation Verify which product, material, and project requirements apply in the country and contract jurisdiction. Confirm the exact edition and scope of every cited standard. Request a technical data sheet, material test reports, installation instructions, and traceable quality records for the supplied lot. Do not treat a general claim of “compliant” or a test-method reference as proof of overall system approval. Match documentation to the specified product and intended use.
Frame, connectors, and corrosion protection Check the frame material, wire or mesh configuration, connector type, coating, and compatibility of dissimilar materials. Inspect specifications and sample components for coating details, damaged areas, sharp edges, secure connections, and evidence of material identification. Choose materials and protective coatings for the project’s exposure conditions. Repair or reject components with damaged protective coatings where the damage could cause premature deterioration.
Foundation and placement Confirm that the base is stable, adequately level for the design, and prepared to manage settlement and surface water. Check the installation plan for ground preparation, drainage, separation or filter layers where specified, and any required survey or compaction checks. Base preparation depends on soil and loading conditions. Obtain engineering review where bearing capacity, slope stability, erosion, or settlement is a concern.
Filling material and placement Verify the specified fill type, particle size range, cleanliness, moisture condition, and placement method. Compare delivered material with the project specification. Fill evenly in controlled lifts and monitor the unit for bulging, distortion, or connector stress during filling. Use only fill approved for the design and installation instructions. Avoid uncontrolled dumping or overfilling that could damage the fabric, frame, or connections.
Assembly and connections Check that panels, adjacent units, lids, pins, and connectors are assembled in the specified order and fully secured. Use the installation drawings and conduct a documented visual check before filling and again after assembly. Do not lift or move a filled unit unless the unit and lifting method are specifically designed and rated for that operation.
Drainage and erosion control Assess whether water could pond, flow through or around the barrier, or erode the ground at its base or ends. Review the site drainage plan and inspect low points, outlets, adjacent slopes, and locations where runoff may concentrate. Provide drainage or erosion-control measures only as specified by the project designer; unmanaged water can undermine the foundation or displace fill.
Routine inspection and maintenance Establish inspection responsibility, frequency, records, and repair procedures for the expected operating conditions. Inspect after installation, severe weather, unusual water flow, nearby ground disturbance, and any observed impact. Record settlement, leaning, bulging, loose connections, fabric damage, corrosion, and erosion. Inspection intervals are project-specific rather than universal. Increase inspection frequency where exposure, consequences of failure, or site conditions warrant it.
Repair, replacement, and end of service Confirm how damaged fabric, connectors, frame components, and fill will be repaired or replaced, and how the unit will be safely decommissioned. Follow approved repair details; reassess the barrier if damage, significant movement, undermining, or loss of fill is found. Do not conceal significant damage with a patch or added fill without confirming that the repair is suitable for the intended service and design requirements.

Select a Barrier Based on Cost and Operational Fit

Choosing a square defensive bastion barrier in 2026 starts with the job it must perform, not its lowest quoted price. Compare the complete installed cost: barrier units, fill material, transport, placement labor, and periodic inspection. A low unit price can become expensive when trucks cannot reach the site or crews must move fill by hand. Check dimensions and connection details against the available footprint. Small mismatches matter. A square layout may fit neatly on a level pad, yet waste space around drains, gates, or existing equipment.

Operational fit also depends on setup time, storage volume, and how often the barrier may need relocation. Ask for documented capacity, material specifications, installation guidance, and inspection criteria; have a qualified site professional review them. These details support a fair comparison instead of relying on broad claims. Consider weather exposure, ground conditions, and the source of suitable fill. In practice, the cheapest configuration is not always the easiest to maintain. And estimates are imperfect. A trial layout can reveal awkward corners, blocked access, or handling problems before a larger purchase. Record the labor and equipment actually used, then revise the budget. There may still be a gap between the worksheet and the muddy site.

How to Choose a Square Defensive Bastion Barrier in 2026

Compare square footprint scenarios by the barrier length required and the area enclosed. These values are calculated from square geometry; they are not product specifications or cost quotes.

How to use this chart: Perimeter length is a basic proxy for barrier material and installation effort, while enclosed area indicates operational space. Actual costs depend on barrier height, fill material, ground conditions, transport, labor, and site requirements.