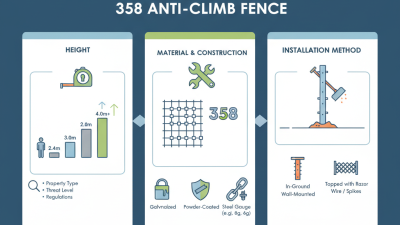
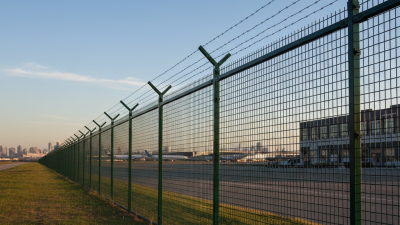
Choosing a 358 Anti Climb Fence is not just a matter of selecting the tallest panel or the lowest price. The right specification depends on the site, the level of protection required, and the conditions the fence must withstand. A school boundary, warehouse yard, and utility compound may look similar on a plan, but their access points, ground levels, and maintenance needs can differ considerably.
Look closely at the mesh opening, wire gauge, panel height, posts, fixings, and coating. The small details matter. A poorly matched post system can weaken an otherwise robust installation. Uneven ground can also leave gaps beneath panels, while exposed sites may demand more durable corrosion protection. Ask suppliers for clear product specifications, installation guidance, and relevant project references. Check the details, not just the brochure.
A verified industry specialist’s name and source quotation should be inserted here before publication: “[Add a confirmed expert’s exact words about choosing a 358 Anti Climb Fence].” An invented quote would make this guide less reliable. That matters. Use the following outline to compare security needs, site conditions, product quality, and lifecycle costs. It will help narrow the options, though no single specification suits every site. One point is easy to miss: the best fence on paper may not be the best fit once terrain, access, and upkeep are considered.
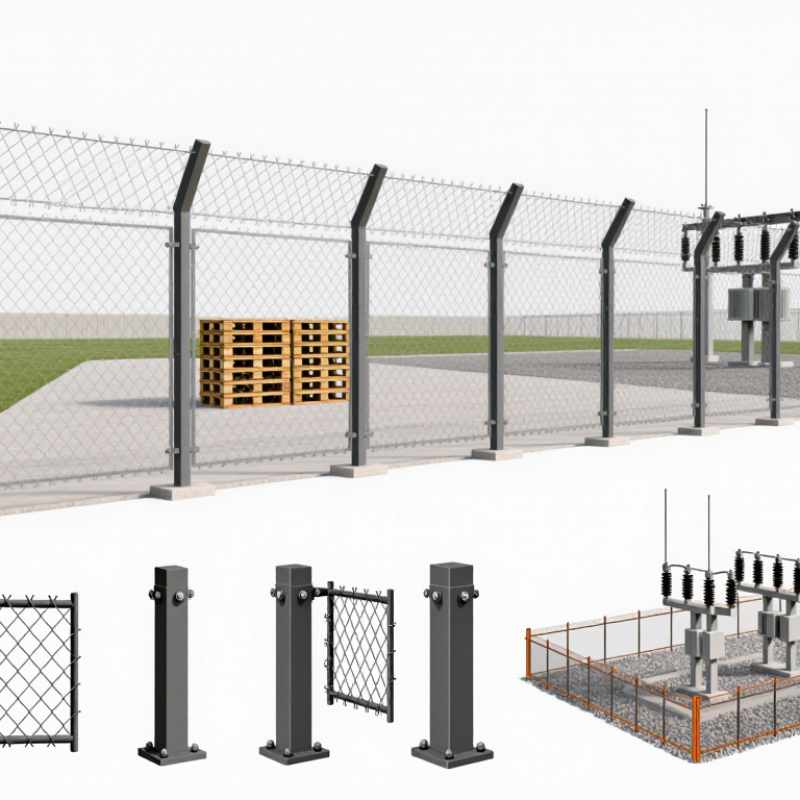
A 358 fence is named for its nominal 3 × 0.5-inch openings and 8-gauge wire. In metric terms, that is 76.2 × 12.7 mm, with wire typically about 4 mm thick. UK Centre for the Protection of National Infrastructure (CPNI) perimeter-security guidance describes this tight mesh as difficult to climb and cut with ordinary hand tools. The narrow openings also limit footholds and make it harder to pass small objects through. Check the actual wire diameter, aperture, and coating on the supplier’s specification; nominal dimensions can vary slightly.
Fit matters. A strong panel can still leave weak points at posts, corners, gates, or the ground line. Look for close panel-to-post connections and a consistent bottom clearance. For a coastal site, ask how the coating resists corrosion, then verify the stated coating standard and test method. A drawing helps. So does a sample. Do not judge rigidity by wire diameter alone; panel folds, weld quality, and support spacing affect how the fence behaves. CPNI guidance is a useful security reference, but site conditions still need assessment.
Tips: Measure one aperture across both directions, and check the wire with calipers. Confirm whether “4 mm” refers to the bare wire or finished coated wire. That detail is easy to miss. A perfect specification still needs a real-site check.
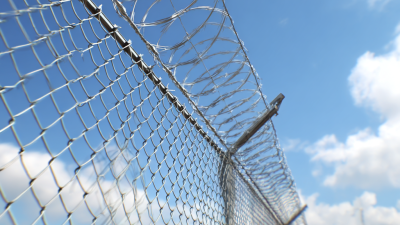
358 Mesh: 76.2 × 12.7 mm Apertures and Typical 4 mm Wire
A typical 358 mesh opening measures 76.2 mm wide by 12.7 mm high, with a 4 mm wire diameter. Compare these dimensions when checking a fence specification; the chart shows each measurement in millimeters.
A 358 anti-climb fence should match the risks and daily routines of its site. Start by identifying exposed boundaries, nearby structures, and areas containing valuable equipment. A fence beside a quiet service yard may need a different height and layout from one protecting a busy facility. Consider visibility, too. Staff should be able to see along the perimeter without fences blocking useful sightlines.
Plan gates and access routes before setting fence lines. Mark delivery entrances, pedestrian gates, and areas where maintenance teams need room to work. Check slopes and ground levels; uneven terrain can leave awkward gaps beneath panels. Height alone is not a complete security plan. Pair the fence with suitable access controls and regular inspections. A drawing may look neat, but the finished layout can feel cramped once vehicles and people use it. Recheck the plan on site.
Tips: Walk the boundary at different times of day. Note blind spots, lighting, and nearby climbing aids such as bins or low structures. Confirm gate clearances and applicable local requirements with a qualified installer. Keep the inspection schedule realistic, or it may be overlooked.
When choosing a 358 anti-climb fence, check how its steel panels are galvanized—not just whether the supplier says “hot-dip galvanized.” ISO 1461 covers hot-dip zinc coatings on fabricated iron and steel articles. Ask for the specified edition, coating thickness requirements, and inspection records. Thickness requirements depend partly on the steel’s thickness, so one number may not suit every component.
Look closely at the manufacturing sequence. If panels are welded before galvanizing, the zinc layer can protect welds and cut edges more consistently. Confirm that the finished panels, posts, brackets, and fasteners are covered by the specification. Small parts matter. Ask how bare spots or damaged areas are assessed and repaired, and request measured results from representative samples. A certificate is useful, but it does not replace clear product-specific requirements.
For extra corrosion protection, some projects add a powder coating over galvanized steel. ISO 1461 addresses the zinc coating, not the full performance of that organic topcoat. Specify surface preparation, coating thickness, adhesion checks, and how compatibility is verified. In practice, unclear coating schedules can create disputes later; I would want the requirements written down before production. Even then, site exposure and handling can affect service life. Be cautious of guarantees that ignore those details.
| Selection Check | What to Specify or Verify | Acceptance Guide | Why It Matters |
|---|---|---|---|
| 358 mesh dimensions | Confirm the nominal mesh opening and wire diameter on the product drawing. “358” commonly refers to approximately 3 in × 0.5 in openings made with 8-gauge wire. | Check the stated dimensions against the project specification and approved drawings; confirm tolerances with the supplier before ordering. | Consistent openings and wire size help maintain the intended resistance to climbing and cutting. |
| Galvanizing process | State whether the fence is hot-dip galvanized after fabrication or made from pre-galvanized wire and then welded. | For fabricated articles, specify hot-dip galvanizing after fabrication to ISO 1461 where applicable. If pre-galvanized wire is used, ask for the relevant coating standard and welding-repair procedure; do not assume ISO 1461 covers the finished mesh. | Post-fabrication galvanizing can coat welds and cut edges that may otherwise be exposed. |
| ISO 1461 coating thickness: steel > 6 mm | Use the ISO 1461 thickness category for the relevant steel thickness. | Minimum mean coating thickness: 85 μm. Minimum local coating thickness: 70 μm. | ISO 1461 sets minimum coating thickness values according to the thickness of the steel article. |
| ISO 1461 coating thickness: steel > 3 mm to 6 mm | Use the ISO 1461 thickness category for the relevant steel thickness. | Minimum mean coating thickness: 70 μm. Minimum local coating thickness: 55 μm. | Check the actual component thickness rather than applying one thickness value to every fence part. |
| ISO 1461 coating thickness: steel ≥ 1.5 mm to 3 mm | Use the ISO 1461 thickness category for the relevant steel thickness. | Minimum mean coating thickness: 55 μm. Minimum local coating thickness: 45 μm. | Mesh wires, posts, and fittings may fall into different thickness categories. |
| ISO 1461 coating thickness: steel < 1.5 mm | Use the ISO 1461 thickness category for the relevant steel thickness. | Minimum mean coating thickness: 45 μm. Minimum local coating thickness: 35 μm. | Confirm that the standard and product construction are appropriate for the specific thin-gauge component. |
| Thickness measurement | Request inspection records identifying the sampling approach and coating-thickness measurement method. | Assess mean and local readings against the applicable ISO 1461 category. Agree sampling and any dispute procedure in the purchase specification. | A single reading does not establish compliance across a complete batch or component. |
| Visual inspection | Inspect the coating for bare areas, blisters, flux residues, and other defects that could affect intended use. | Evaluate appearance and repairability in accordance with ISO 1461 and the agreed project requirements. Define permitted repairs before delivery. | Visual checks can identify defects that thickness measurements alone may not reveal. |
| Duplex system: galvanizing plus powder coating | Specify the galvanized substrate, surface preparation, powder-coating system, colour, and required coating thickness separately. | ISO 1461 covers the hot-dip galvanized coating, not the powder-coat performance. Set powder-coating requirements and inspection criteria in a separate specification. | Correct preparation and compatible coatings support adhesion and outdoor durability. |
| Welds, cut edges, and repairs | Ask how damaged or uncoated areas will be assessed and repaired, including after installation or site cutting. | Require repair methods and limits to follow the applicable standard and project specification; document repaired areas. | Exposed steel can corrode, particularly at damaged coating areas and site-modified parts. |
| Environmental exposure | Identify the site environment, including coastal salt exposure, industrial pollutants, moisture, and contact with dissimilar metals. | Choose the coating system and maintenance plan for the actual exposure conditions; ISO 1461 thickness compliance alone does not predict service life. | Corrosion rates vary with exposure, drainage, maintenance, and installation details. |
| Documentation and traceability | Request the applicable standard edition, coating inspection report, batch identification, and product drawings. | Match documents to the delivered fence panels, posts, and fittings; resolve any exclusions or deviations before acceptance. | Clear records make it easier to verify that supplied components meet the agreed specification. |
Note: ISO 1461 specifies requirements for hot-dip galvanized coatings on fabricated iron and steel articles. Its thickness values depend on the relevant steel thickness and should be applied to the correct component category. Confirm the standard’s scope, the applicable edition, and project-specific requirements before purchase.
For 358 anti-climb fencing, post and foundation design should start with the site wind climate, not a standard post spacing. The small mesh openings reduce wind exposure, but the fence is not wind-proof. EN 1991-1-4:2005+A1:2010 sets out how to determine wind actions using factors such as basic wind speed, terrain, height, and topography. It gives a recommended air density of 1.25 kg/m³. At 30 m/s, that produces a basic velocity pressure of about 563 Pa, before exposure and pressure coefficients are applied.
Not the final fence load. Use the applicable National Annex for local wind data.
For each panel, convert the design pressure into a load over its exposed area, then check the posts for bending and deflection. Wider post spacing increases the load carried by each post. Foundations must resist overturning and soil movement, especially in soft or recently disturbed ground. Check embedment depth and concrete dimensions against the calculated base moment and verified soil conditions; a neat-looking footing is not proof of capacity. European Commission Joint Research Centre Eurocode guidance emphasizes site-specific wind parameters, so avoid copying values from a nearby project without checking its terrain and exposure. Small details matter. I would also record assumptions, because fence loads can change sharply across an exposed corner or ridge.
A 358 anti-climb fence is only as dependable as its connections. Compare fixing types, not just panel height and mesh size. Bolts, clamps, and posts should suit the panel specification and site conditions. Check that exposed fixings resist tampering and that dissimilar metals will not encourage corrosion. The small details matter. Ask how installers will reach each connection for routine checks.
Gate details can weaken an otherwise consistent fence line. Check that the mesh, frame, hinges, and latch work together without creating large gaps. Confirm the opening width suits people, equipment, or planned vehicle access. A gate that is heavy or frequently used needs durable hinges and a latch that remains aligned. It is not glamorous. But poor alignment can make daily operation awkward.
Inspection access deserves a place in the layout, not an afterthought. Walk the proposed perimeter and note corners, slopes, drainage areas, and locations where vegetation may hide damage. Leave practical access for checking posts, fixings, and gate hardware. A narrow route may look tidy on a drawing, yet prove difficult to use with tools. Some sites need more access than expected; review that assumption before installation.