Your Ultimate Peach Post Fence Installation Checklist for a Perfect Setup
In recent years, the popularity of Peach Post Fence installations has surged, driven by their aesthetic appeal and structural benefits. According to a report by the American Fence Association, nearly 60% of homeowners are investing in fence solutions that enhance both landscape and privacy. The durability of Peach Post fencing, known for its resistance to weathering and pests, makes it an ideal choice for many residential projects.
 With installations increasing by over 25% in the past five years alone, having a thorough checklist for the perfect setup is essential for homeowners aiming for a flawless outcome. This guide will provide critical insights and steps to ensure your Peach Post Fence not only meets but exceeds your expectations in functionality and design.
Essential Tools You Need for Successful Peach Post Fence Installation
When embarking on your peach post fence installation project, having the right tools is crucial for a smooth and successful setup. First and foremost, you’ll need a post hole digger to create deep and accurate holes for your posts. Whether you opt for a manual or powered version, this tool will make the foundational work much more manageable. Additionally, a level is essential to ensure that your posts are straight and that your fence will stand tall and sturdy for years to come.
Don’t forget about a good set of measuring tools, such as a tape measure and a marking tool, to help you plan your layout precisely. Accurate measurements can prevent costly mistakes and ensure that your fence follows the contour of your property perfectly. A hammer and nails or screws will be needed for securing your fencing material onto the posts. Lastly, having a pair of work gloves on hand will protect your hands from splinters and ensure a safer installation experience. With these essential tools at your side, you’ll be well-equipped to achieve a flawless peach post fence installation.
Your Ultimate Peach Post Fence Installation Checklist for a Perfect Setup
| Tool Name |
Purpose |
Required Quantity |
Recommended Type |
| Post Hole Digger |
Dig holes for fence posts |
1 |
Manual or powered |
| Level |
Ensure posts are vertically aligned |
1 |
Bubble level |
| Tape Measure |
Measure distances for post placement |
1 |
25 ft or longer |
| Hammer |
Drive down stakes and nails |
1 |
Claw hammer or sledgehammer |
| Concrete Mix |
Secure posts in the ground |
As needed |
Quick-setting mix |
| Safety Gear |
Protect cords and eyesight |
1 set |
Gloves and goggles |
| Post Driver |
Drive posts into the ground |
1 |
Manual or impact driver |
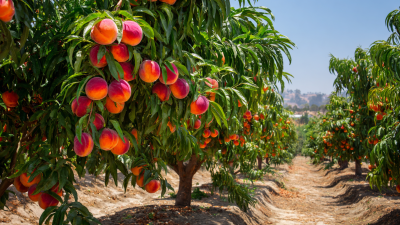
Understanding the Types of Peach Posts and Their Benefits
When it comes to fence installation, choosing the right type of
peach post is crucial for ensuring durability and aesthetic appeal.
There are several types of peach posts available, each offering unique benefits tailored to specific fencing needs.
For instance, pressure-treated wooden peach posts are favored for their strength
and resistance to decay, making them an excellent choice for long-lasting installations. Their natural aesthetic blends
seamlessly with various landscapes, providing an organic look that complements outdoor settings.
Alternatively,
vinyl peach posts have gained popularity due to their low
maintenance requirements and versatility in design. Unlike wood, vinyl does not require regular staining or sealing,
which makes it an ideal option for those seeking a hassle-free solution. Additionally, vinyl peach posts come in
various colors and styles, allowing homeowners to customize their fences to fit their personal taste. Understanding
these different types of peach posts can greatly impact the overall success of your fence installation, leading to
a setup that not only meets your practical needs but also enhances your property's visual appeal.
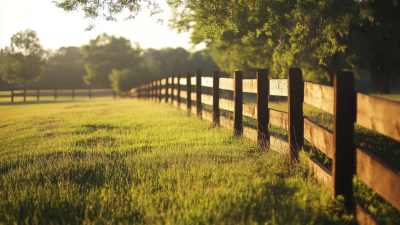
Step-by-Step Guide to Preparing Your Site Before Installation
When preparing for a fence installation, taking the right steps before the actual setup can make a significant difference in the outcome. Start by evaluating your site carefully. Remove any obstacles like rocks, plants, or existing fencing in the area where the new fence will be installed. This makes the work easier and ensures that the fence is built on solid ground.
Next, it's crucial to map out the fence layout. Use stakes and string to visualize where each section will go, which allows you to make adjustments before digging. This helps in avoiding issues with property lines or any underground utilities. Always remember to check local regulations regarding fence heights and styles to maintain compliance with any neighborhood guidelines.
Finally, gathering all necessary tools and materials ahead of time can streamline the installation process. Ensure you have a post hole digger, level, and tape measure on hand, along with the fence panels and hardware. A well-stocked toolkit means less downtime during the setup, allowing you to achieve a perfect result effortlessly.

Common Mistakes to Avoid During Peach Post Fence Setup
When installing peach post fences, avoiding common mistakes can make a significant difference in both the aesthetic appeal and structural integrity of the setup. According to a study by the American Society of Landscape Architects, nearly 25% of fence installations fail due to improper post depth. Ensuring that your posts are buried at least one-third of their height in the ground is essential for enduring stability, especially in regions with fluctuating weather patterns.
Another frequent oversight is neglecting to choose the right type of wood suitable for outdoor use. Research from the Forest Products Laboratory indicates that using untreated wood in high-moisture areas can lead to a decrease in lifespan by up to 50%. Opting for pressure-treated wood or naturally rot-resistant varieties like cedar can enhance durability, reducing the need for frequent repairs. Additionally, failing to account for local zoning laws and property lines can lead to costly legal disputes, emphasizing the importance of conducting thorough research before beginning installation.
Maintenance Tips for Longevity of Your Peach Post Fence
Maintaining your peach post fence is essential for ensuring its longevity and enhancing its visual appeal in your garden. Regular inspections should be your starting point; check for any signs of damage, such as rot or insect infestations, especially in wooden posts. Applying a protective sealant or stain helps prevent moisture from seeping into the wood, which can extend the life of your fence significantly. Additionally, reinforcing the base of your posts with gravel can help with drainage, reducing the likelihood of erosion and swelling that might compromise your fence structure.
Seasonal upkeep is equally crucial. During the fall, it's advisable to clear away any debris or plants that may have grown around the fence, which can trap moisture and lead to premature decay. In the spring, consider applying a fresh coat of protective finish and checking for loose boards or hardware. Pruning nearby vegetation can also prevent overgrowth from shading the fence, which can encourage mold and mildew growth. By adhering to these maintenance tips, your peach post fence can maintain its charm and functionality for years to come.